Shipment Window


|
Parts of the Invoice Screen Shipment Window |
|
|
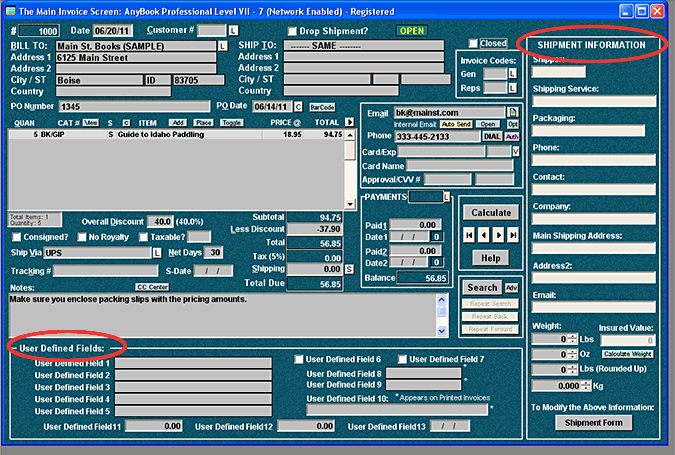
Shipment Fields are available with the Level 4 program and above. Another set of fields compliments those found on the Main Invoice Screen and are used specifically for shipping purposes. In particular, you can use them to automatically complete on-line shipping forms, or to export information to shipping software like UPS Worldship. They can also be used for mail merge purposes such a filling out a Bill of Lading form. In order to access these fields, they must be turned on. To do so, select FILE >> ACTIVATE SHIPMENT & USER DEFINED FIELDS. Once you've activated Shipment Fields, you can access them by selecting WINDOW >> SHIPMENT WINDOW. You have two choices. The first is to have a window overlap the Main Invoice Screen. The second is to attach the shipment window to the right side of the screen. In order to use the attachment option, you will need to have your monitor resolution set at 1024 by 768 pixels or greater. The illustration, below, shows the Shipment Window attached to the side of the screen. It also shows the User Defined Window attached to the bottom of the screen (more information on the User Defined Fields Window.)
When the Shipment Window is attached, you can see the values in the fields. In order to make changes to the values, you'll need to click on the "Shipment Form" button at the bottom of the screen. This brings up the Shipment Overlay Form which provides you a full range of features for adding or changing shipment information. More information: Shipment Form |