| Vendor Numbers: General Information |
|
|
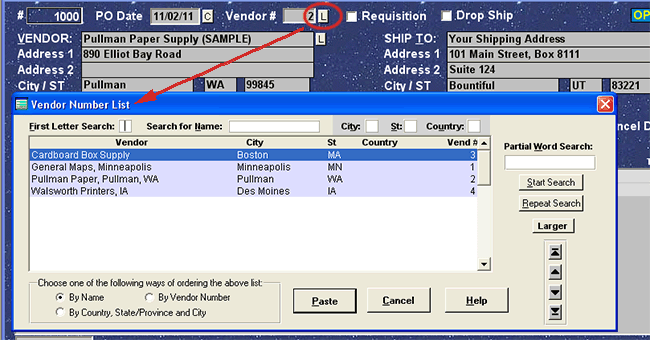
If you have regular vendors, you'll want to put them into the Vendor Information Database. To do so, select OTHER TASKS >> VENDOR NUMBERS AND ADDRESSES from the Menu Bar. The Vendor Information Database screen will appear. On this screen, you can enter the names of vendors and other vendor information. For complete information, see: Vendor Database. Once you have one or more vendors in the Vendor Database, you can have the program automatically enter the vendor's name and address on the Main Purchase Order Screen. That's done by clicking the "L" button beside "Vendor #," shown below. A pop-up list of vendors appears from which you can select:
The pop-up list of vendors can be brought by several methods:
Note that there are two similar pop-up lists. This list shows all vendors in your Vendor Database. You can also bring up a list of all vendors on previously issued purchase orders. More information on that pop-up list is found here.
|