Details on the "Miscellaneous" Page


|
Basic Program Set-Up: Details on the "Miscellaneous" Page |
|
|
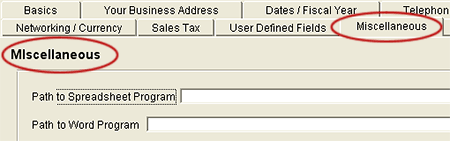
To reach the Miscellaneous Page, select FILE and BASIC PROGRAM SET UP from the Menu Bar. Click on the "Miscellaneous" tab on top of the page. The Miscellaneous page will appear.
Parts of this screen include: Path to spreadsheet program. Most of the reports that AnyPO creates can be moved into Microsoft Excel or other spreadsheet programs. Programs like Excel have a rich range of formatting and printing features, and this method of report printing allows you to take full advantage of those and other features. In order to access Excel (or other spreadsheet programs), AnyPO needs to have directory path to the program. If you click on the "More Info & Browse" button, AnyPO will provide a little guidance on how to find the Excel program file. Browse To Find It . . . In order to access Excel (or other spreadsheet programs), AnyPO needs to have the directory path to the program. One way to indicate the path is to click on the 'Browse' button below and look for the file 'EXCEL.EXE.' It's best to set your file directory so you can see extensions. You should end up with a path similar to: C:\Program Files\Microsoft Office\Office\Excel.exe. Make sure you have Excel.exe at the end. If you have difficulty finding it, use the Windows SEARCH feature and search for the file 'EXCEL.EXE.' If Browse Doesn't Find It . . . If, after doing a search, you can't find EXCEL.EXE, you may have a new type of program which is called 'Click to Run.' If so, use this procedure: 1. Right click on the Excel icon on your desktop, and select 'Properties. Look for the 'Target' field. You'll be looking for something like this: "C:\Program Files\Common Files\Microsoft Shared\Virtualization Handler\CVH.EXE" "Microsoft Excel 2010 9014006204090000" 2. Notice that it's a long path. If it's a short path like: 'Microsoft Office Excel 2010,' then you DO NOT have the correct path. If that's the situation, first check Microsoft's documentation to make sure you have 'Click to Run.' If not, use the 'Browse' button and do a search for Excel.exe as described above. 3. Once you are assured that you have the correct path, make sure the entire path is highlighted. Then press CTRL+C on your keyboard to copy it to the clipboard. 4. Finally, paste the path into the directory path field by placing your cursor in blank and pressing CTRL+V on your keyboard. Path to word processor. For certain processes in AnyPO, you can automatically start up Microsoft Word (or a word processor of your choice). This allows you to create mailing labels, auto-fill business forms, or generate mail-merged letters (or email-merged letter). In order to access Word (or another word program), AnyPO needs to have directory path to the program. Browse To Find It . . . In order to access Word (or other word processing programs), AnyPO needs to have the directory path to the program. One way to indicate the path is to click on the 'Browse' button below and look for the file 'WINWORD.EXE.' (It's best to set your file directory so you can see extensions.) You should end up with a path similar to: C:\Program Files\Microsoft Office\Office\Winword.exe. Make sure you have Winwordord.exe at the end. If you have difficulty finding it, use the Windows SEARCH feature and search for the file 'WINWORD.EXE.' If Browse Doesn't Find It . . . If, after doing a search, you can't find WINWORD.EXE, you may have a new type of program which is called 'Click to Run.' If so, use this procedure: 1. Right click on the Word icon on your desktop, and select 'Properties. Look for the 'Target' field. You'll be looking for something like this: "C:\Program Files\Common Files\Microsoft Shared\Virtualization Handler\CVH.EXE" "Microsoft Word 2010 9014006204090000" 2. Notice that it's a long path. If it's a short path like: 'Microsoft Office Word 2010,' then you DO NOT have the correct path. If that's the situation, first check Microsoft's documentation to make sure you have 'Click to Run.' If not, use the 'Browse' button and do a search for Winword.exe as described above. If you do have 'Click to Run,' then you'll want to refer to Microsoft's help information to find the correct path. (Note that Microsoft allows you to switch to a standard Word if 'Click to Run' is problematic for you.) 3. Once you are assured that you have the correct path, make sure the entire path is highlighted. Then press CTRL+C on your keyboard to copy it to the clipboard. 4. Finally, paste the path into the directory path field by placing your cursor in blank and pressing CTRL+V on your keyboard.
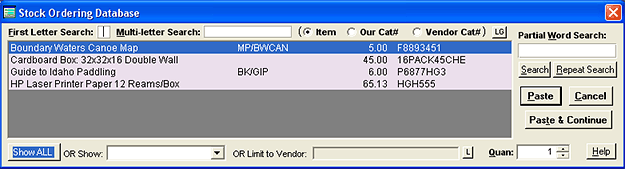
Each time the stock pop-up list is opened, start with the following sort order: One of the most frequently used lists in AnyPO is the Stock Pop-up List shown below:
The list is used to paste products on the purchase order - saving you from having to type out all of the information. You can control the order of the list when it first appears. Place a checkmark beside "Item Name if you'd like the list to be ordered by the item's name. Or place a checkmark beside "Catalog Number" if you'd like the list to be ordered by catalog number. Note that with a recent upgrade to AnyPO, we have made this option conveniently accessible right on the Stock Pop-up List. You can select here in Basic Set-up or on the Pop-up List.
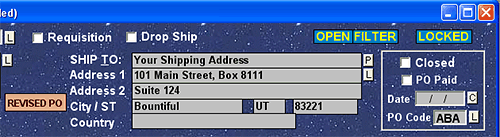
Automatically lock the PO when it is marked closed This feature locks the PO as soon as it is marked closed. The "Closed" checkbox is located in the upper right hand corner of the Main PO Screen.
When you place a checkmark here, the OPEN indicator disappears. If you turn this feature on, the OPEN indicator disappears and the PO is locked.
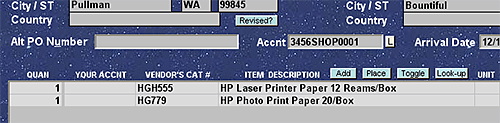
Require a Job / Account Code before closing PO Level II - III. Generally this feature is used when you are using the Job field on the Main Purchase Order Screen for account codes. The illustration below shows the location of the Job code upper middle of the Main Purchase Order Screen:
This shows that the job field has been re-named and being used for account codes. You can re-name fields on the Main Purchase Order screen here.
If you select this option, AnyPO will not allow the user to move to a new PO or exit the program without entering in code. This way you are assured that all PO's have an account code entered. More information on how to use Job or Account Codes is found here.
Use one-click (instead of a double-click) to make selections from lists One of the methods by which you can select from a list involves placing a checkmark in the left-most column. For example, to select which purchase orders you want printed during a Batch Print process, you would place checkmarks in the left column beside the appropriate purchase orders. To place checkmarks by using only one click of your mouse, select the "One-click" box. To use a double-click technique, leave the "One-click" box empty."
Price Each Field: Increase to Three (3) Decimal Places This option allows you to increase the "Price Each" (Price @) column which appears in the Item Area on the main Purchase Order Screen from two decimal places to three decimal places. Normally, two decimal places are sufficient, but some vendors may sell goods by a tenth of penny. For example, you may purchase wire which is sold for $3.235 per linear foot. To turn this feature on, you must first activate "Products Sold by Measurement" above. Even if you don't use the measurement features, you'll still need to activate this feature first. The three decimal place feature require the same file configuration as utilized by the measurement feature. Place a checkmark beside it and return to the Main PO Screen. Now you'll see three decimal places appear in the "Price @" column of the Item Area. You'll also see three places in the Alternative Product Entry Screen. And, prices in the Stock Ordering Database will also have three places. When you print PO's, the extra decimal place will only show up for those products which have three place prices. All other products will be printed with the usual two decimal places.
Job / Account Code: When using the pop-list, paste code normally but also paste to the Cat # field of all ordered products. Level II - III. The Job field on the Main Purchase Order screen can be used for job codes or account codes.
Next to the Job Code field on the Main PO screen is an 'L' button. The 'L' button activates a pop-up list. Normally, whatever code you select from the list is pasted to the Job/Account Code field. However, for some situations, particularly if you are using account codes, you may wish to paste the code to Item Area. The code will be pasted to the user changeable Cat # field on ALL ordered products. Once the code is pasted, and if needed, you can individually change any product to a different code by using STOCK TOOLS >> INSERT JOB/ACCOUNT CODE. More information on how to use Job or Account Codes is found here.
Start-up Switches This field is used for two purposes. It is used for beta testing new features, and it is used for customized features. If you contract us to build something special for you, this is where you would enter a code so that you can access the customized feature. Otherwise, for the most part, you won't have to worry about it.
Use the "Terms" field on the Main PO Screen for PDF scans of related documents, i.e. invoices, quotes, etc. Level III Feature: If desired, you can use the 'Terms' field found on the Main Purchase Order Screen for PDF image files. (The terms field is rarely used from your end of things since terms are normally pre-set by the vendor). The image files may be scans of invoices, quotes or other documents associated with the PO. In some cases, such as when you phone in an order, it may be easier to attach a PDF scan of the vendor's invoice rather than filling out a complete Purchase Order. You can use a purchase order in AnyPO to summarize the items ordered, and leave the details to the scanned invoice. The first illustration shows the Terms field before configuring it to hold an attachment:  This shows the Terms field before it has been configured to hold an attachment. The second illustration show the Terms Field after it has been configured:  In this example, the Terms field has been re-configured to hold an attachment. It's been re-named "Attachment" (you can do that by clickin on "User Defined Fields tab and indicating a name.) Notice the new buttons: "B" means browse and allows you to select a file. "V" means view and allows you to open and view the file.
There is limited space in the Terms field, and you'll want to keep file names of the PDF images short (under 30 characters). It's also a good idea to put them all in one directory. You can indicate the directory where the files are kept in the next field. (While there is a limit of 30 characters for the file name, there is no limit on the amount space for the directory name.) If you place a checkmark here, you'll find new "B" and "V" buttons located after the Terms field on the Main Purchase Order Screen. Click on the "B" button to browse and locate the PDF image file. Click on the "V" button to view the image file.
Directory for PDF Attachments Level III Feature: To view PDF attachments associated with the purchase orders, indicate the common directory in which the PDF's are found.
Local Level III feature. This goes along with the "Directory for PDF Attachments" (above). If you have a network, is this directory different on each workstation? If it is, then place a checkmark here. If you use one common directory on the server machine and the directory is always the same, leave this blank. Note that in most cases, you'll probably not want to use "Local." It means that you'll only be able to see the attachment on the local computer. It's best to use a network directory and then all workstations can access the attachment.
|